After having clients call for status updates during a production outage earlier this week, I started thinking more about the classic “status page.” This is for a side business, so I don’t really want to pay $30/mo to StatusPage.io for this functionality. How could I do something high quality but for low cost?
Luckily, I found an open source statuspage that gets me most of the way there. It allows for hosting on Github Pages, thus decoupling my production infrastructure from the status infrastructure. (Its not very useful if your status page goes down at the same time as your production stuff, so its best to decouple them as much as possible.)
Unfortunately, this project requires manually running a shell command every time we create, update, comment on, or close an issue. While this is OK, in the heat of the moment, the fewer things I need to remember to do the better. I saw an option to pay the creators $30/year to automate this for you, but clicking the link took me to a dead site. Plus I wanted to play with some of the newer AWS stuff anyway.
So without further adieu, let’s walk through using Amazon to automate updates to your status page… for free!
The big picture for how this is going to work:
1. Create an Amazon Lambda function with an API Gateway trigger to serve as our webhook.
2. Configure your GitHub Pages repo to notify this webhook any time an issue is created, edited, commented on, or deleted.
Of course, the devil is in the details. So let’s get to it.
First thing to do is setup the statuspage normally. Just follow the instructions in https://github.com/jayfk/statuspage. They’re very straightforward. When you’re done, you should have a `statuspage update` command that you need to run after modifying any issues in your new gh-pages repo.
Next, I created a repo with the code and build instructions you’ll need for the Lambda project. Go ahead and git clone it from https://github.com/codyaray/update-statuspage-lambda and follow the instructions in its README. Update config.py with the repo name, api token, and (optionally) the organization you used for setting up your statuspage in the previous step. Once you’ve made it through the build step, you should have a zip file.
(Word of warning: don’t commit/push your API token to Github or you’ll find that it gets automatically deleted for you and your automation stops working. I heard it from a friend… )
Okay, now we can start actually creating the webhook in Amazon using Lambda + API Gateway.
Well, first we’ll jump forward a few steps and point out that the zip file is probably too large to upload directly; it just kept timing out for me. Instead, we’ll start by uploading the code into to S3 and load it into Lambda from there.
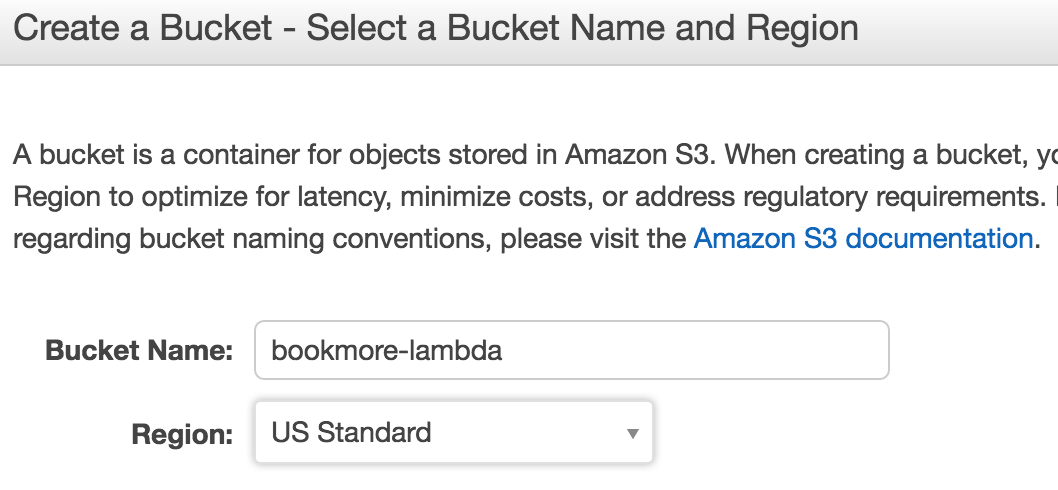
Create a new S3 Bucket for your lambda functions, like `<my-org>-lambda`.
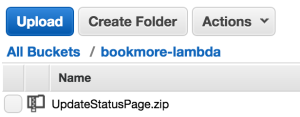
Click into your new bucket, select Upload, and find your UpdateStatusPage.zip file created during the build process. That’s the one we want to upload to be loaded into Lambda.
Now right click the zip file and select Properties. In the right pane, you should see a link. Something like the following. (Don’t worry, the link and your github token is secure.)
![]()
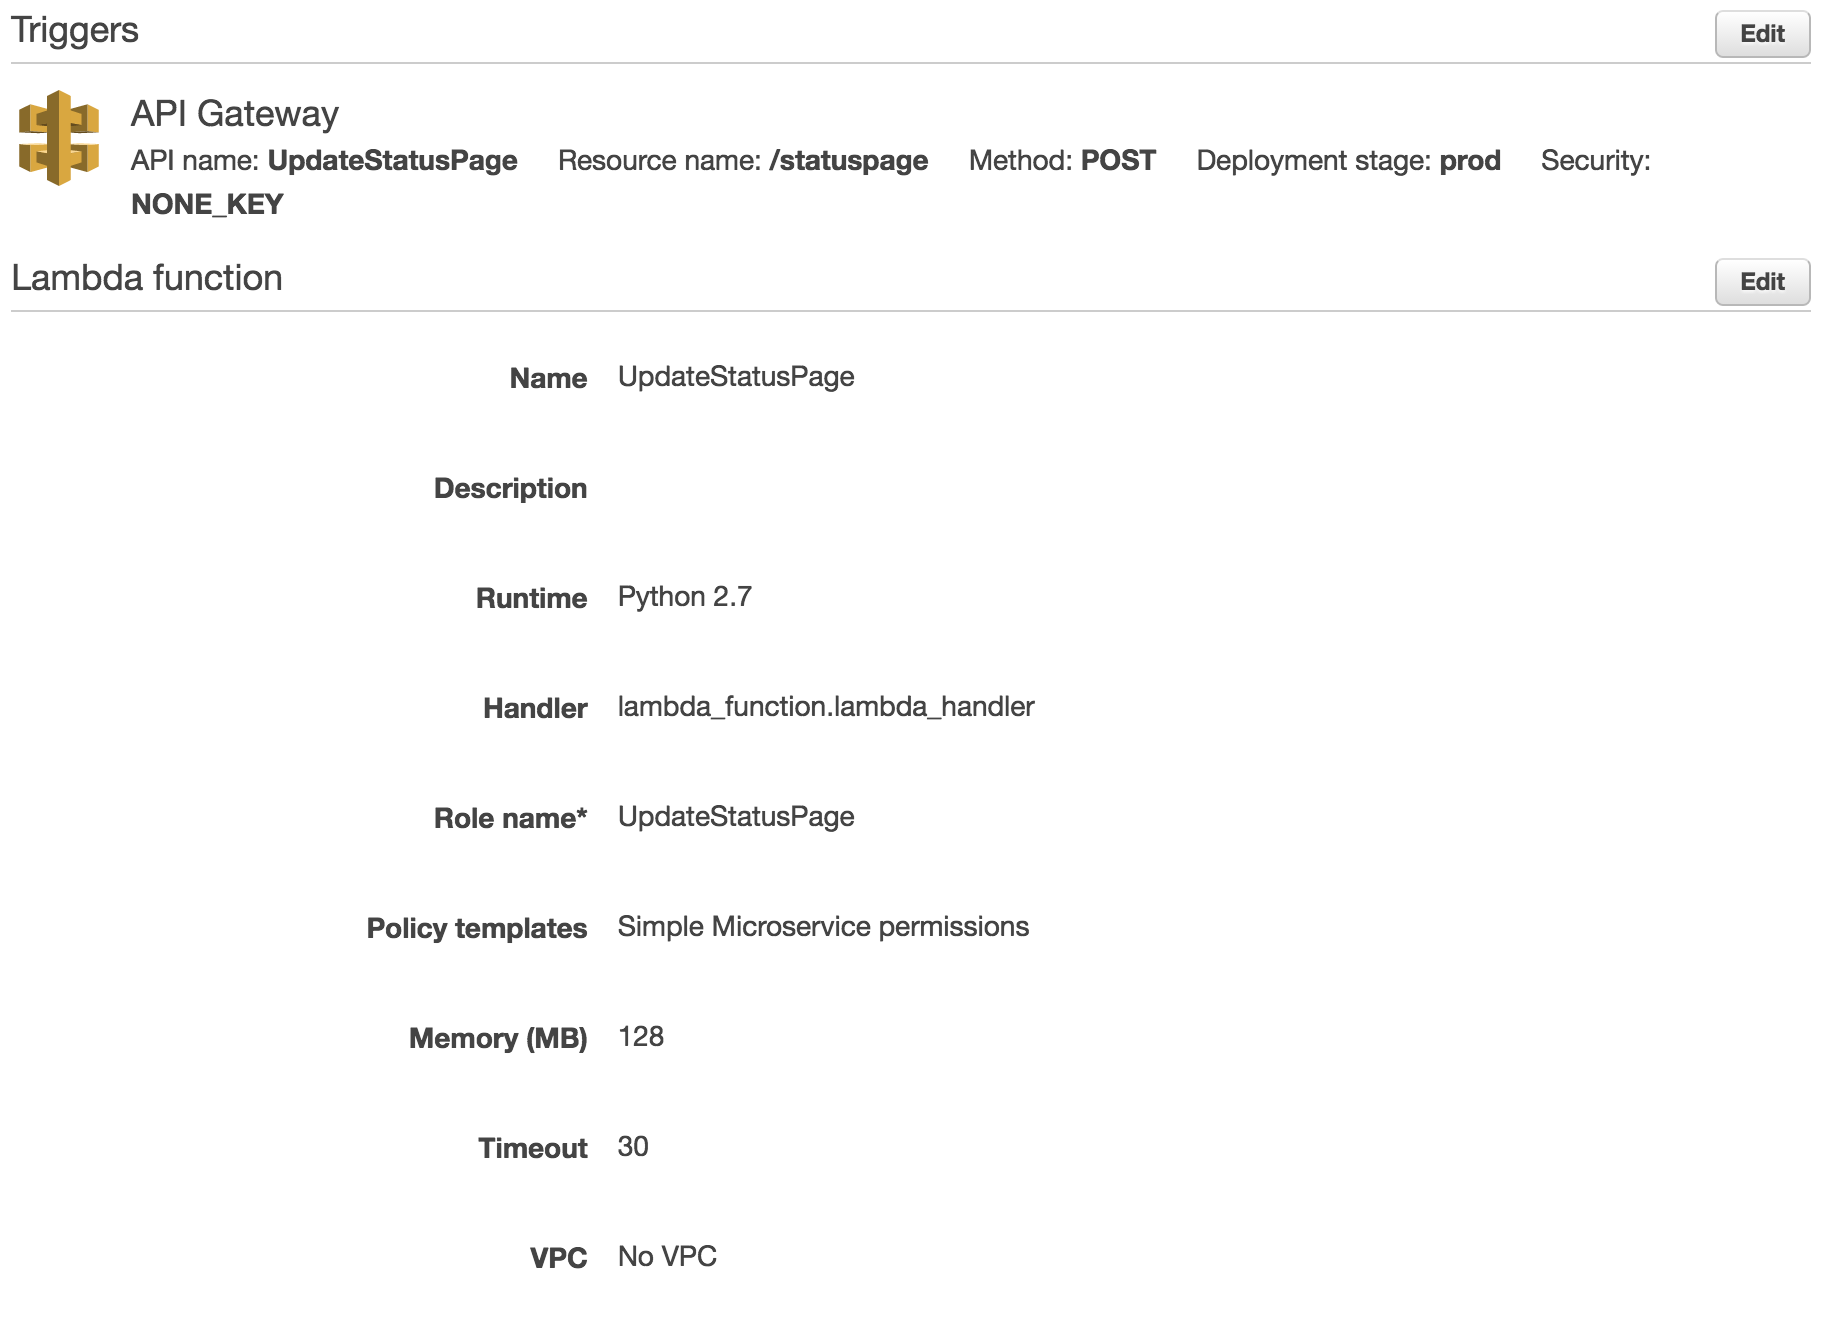
Okay, now we can actually create our Lambda function. Open the Amazon Lambda console in your browser. Start with the microservice-http-endpoint-python blueprint. Use the following settings to configure the API Gateway trigger.
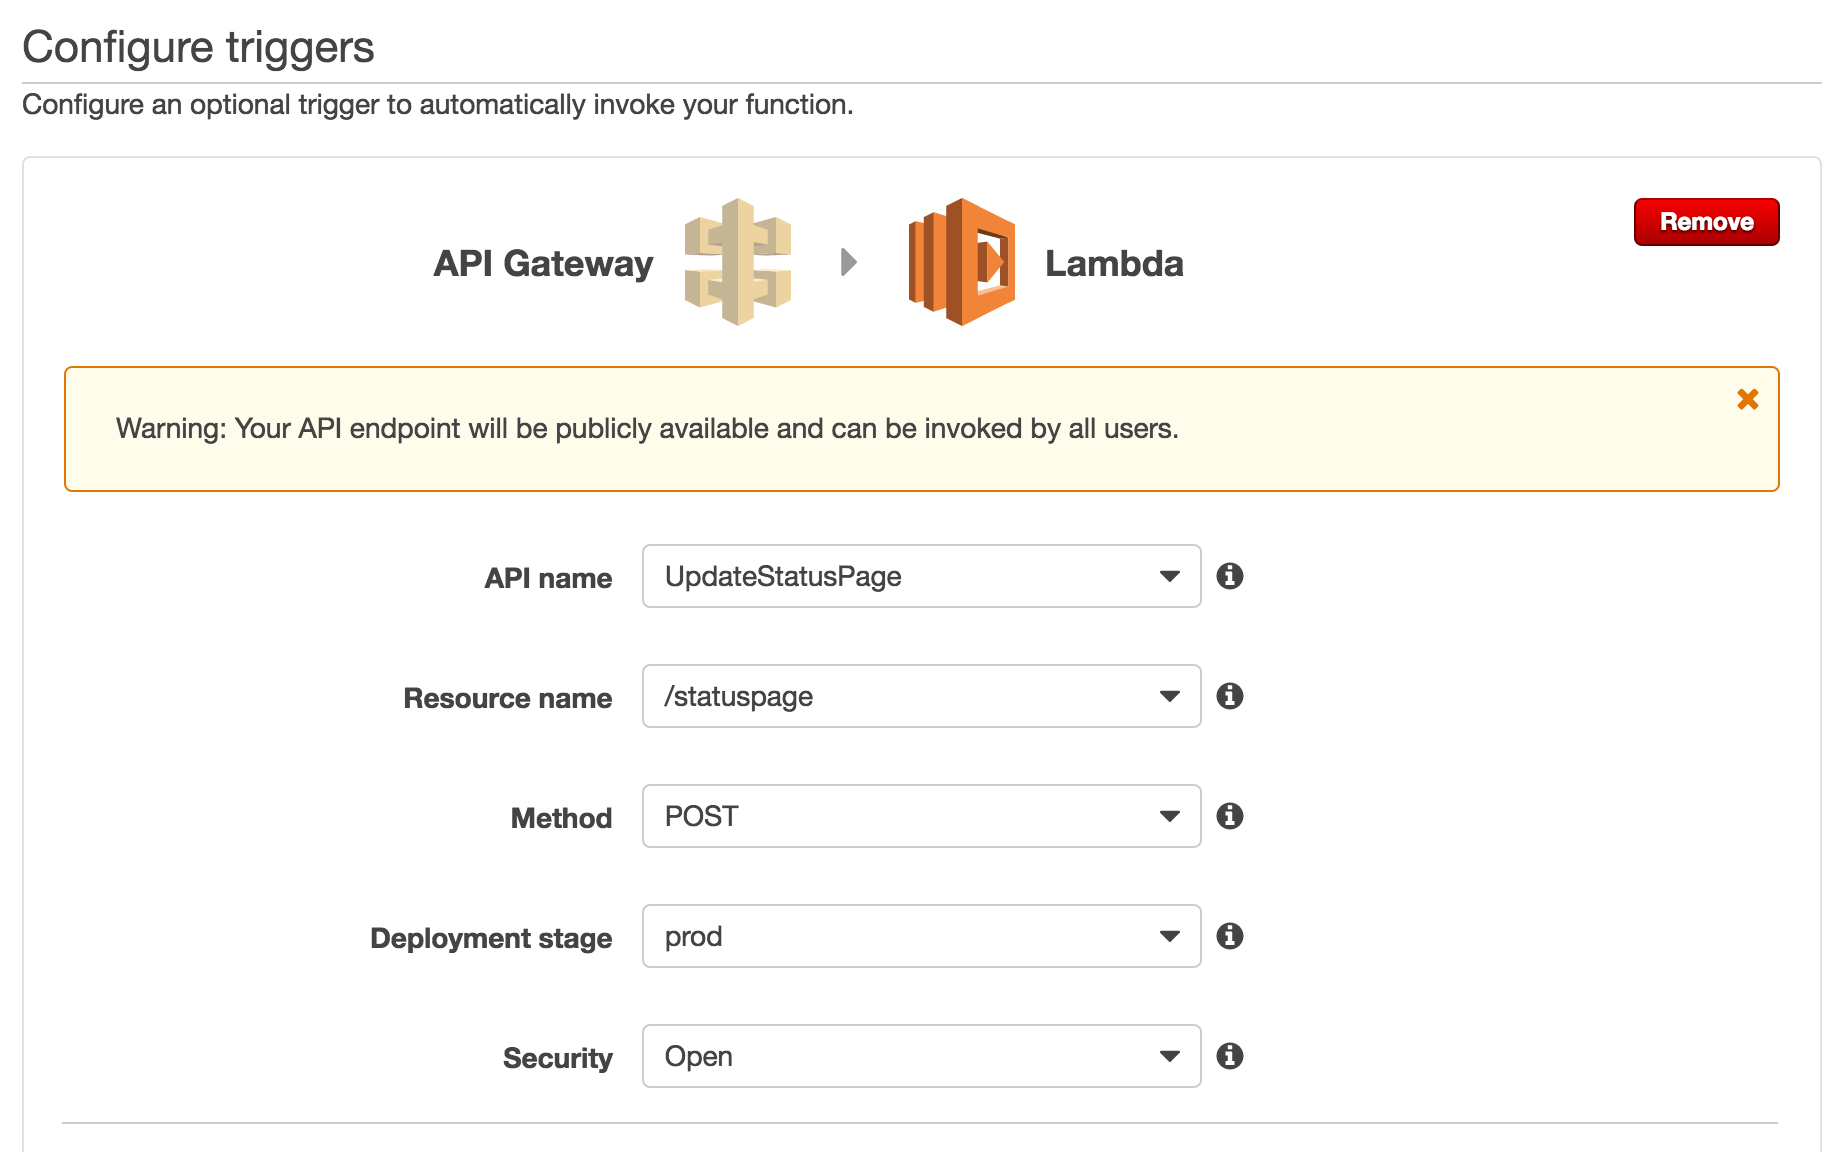
Note that we’re forced to open security because the API Gateway demands its API Key as a header, but Github doesn’t support sending custom headers. A similar issue goes for signing the requests; Amazon demands a different custom header for the signature.
The Lambda function configuration should look as follows.
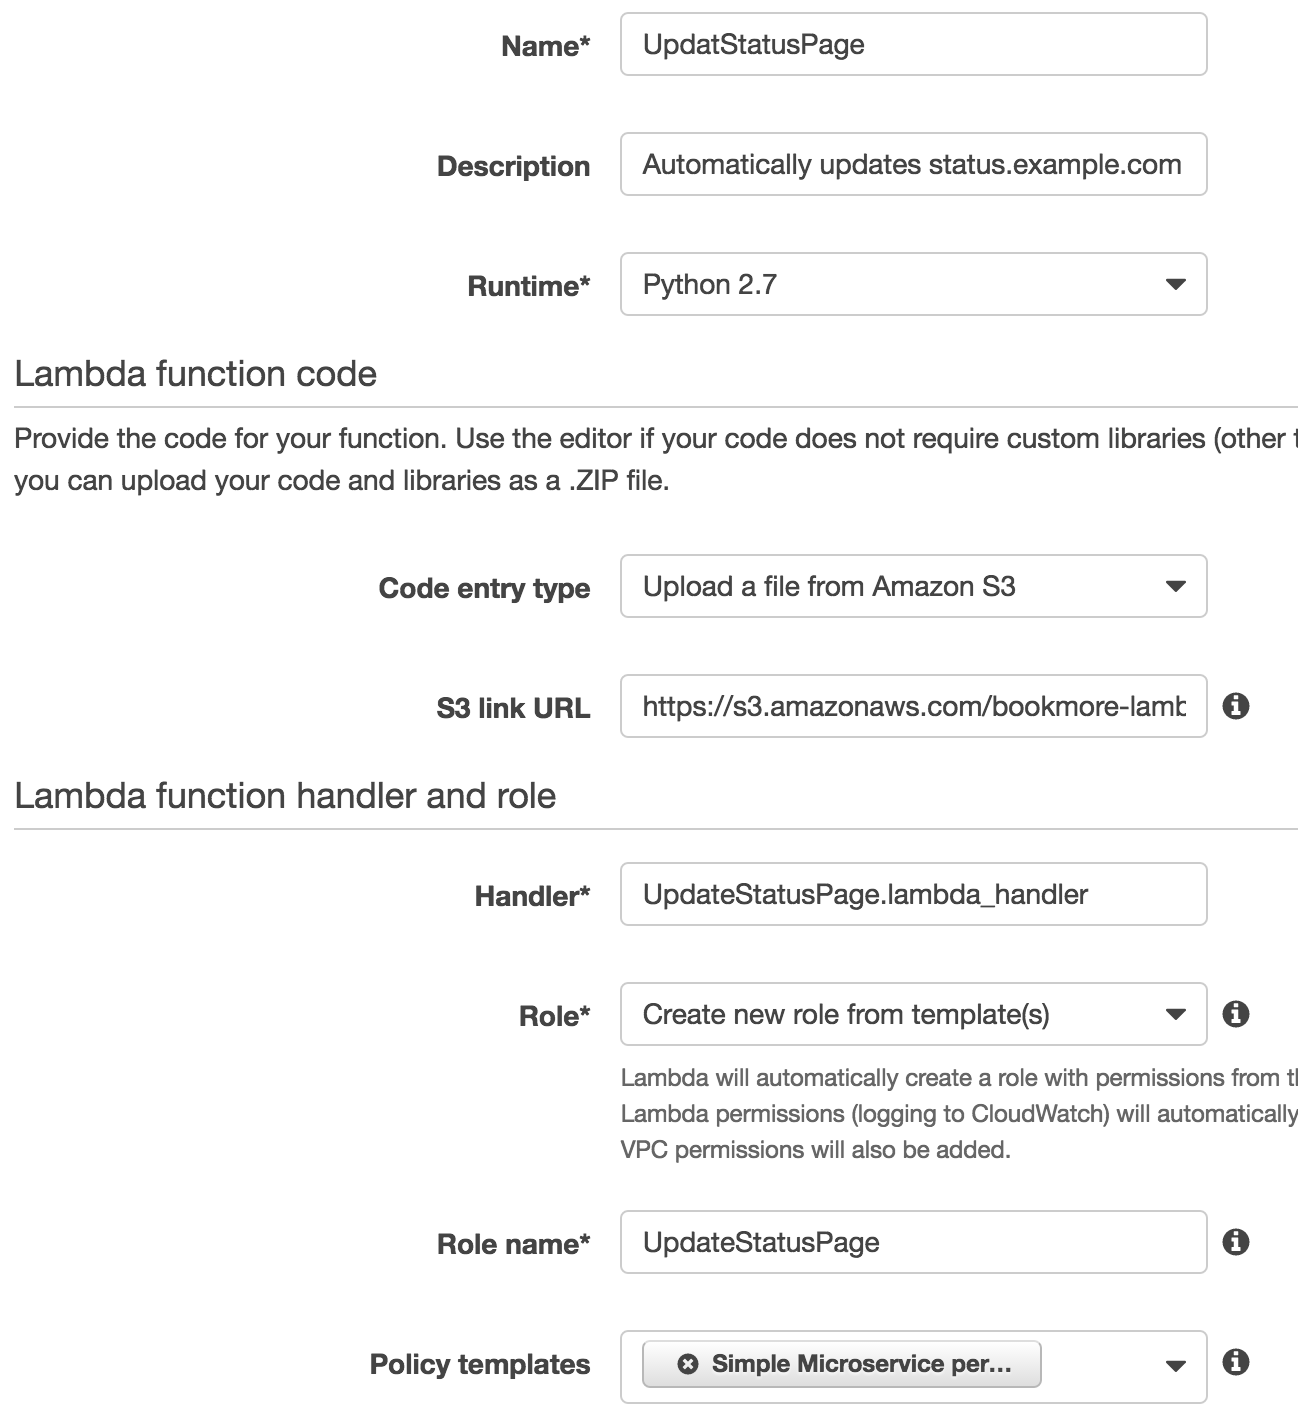
Notice that we’re providing the S3 link from the previous step exactly from the S3 page. We don’t have to do anything else with IAM to make sure that Lambda can read this secure URL. We’re also updating the Handler to match the lambda file and function names: `UpdateStatusPage.lambda_handler`. Finally, we’re just creating a new role from the blueprint template with a name that matches the Lambda function.
All together now, your settings should look something like this:
Before you move on, you should be able to test your new Lambda function by clicking “Test”. You should see the output indicating whether it generated new files or had nothing new to generate. If you go to your statuspage repo in Github and create or modify an issue, running the test again should show changing output Obviously, your statuspage itself should be updating as well now.
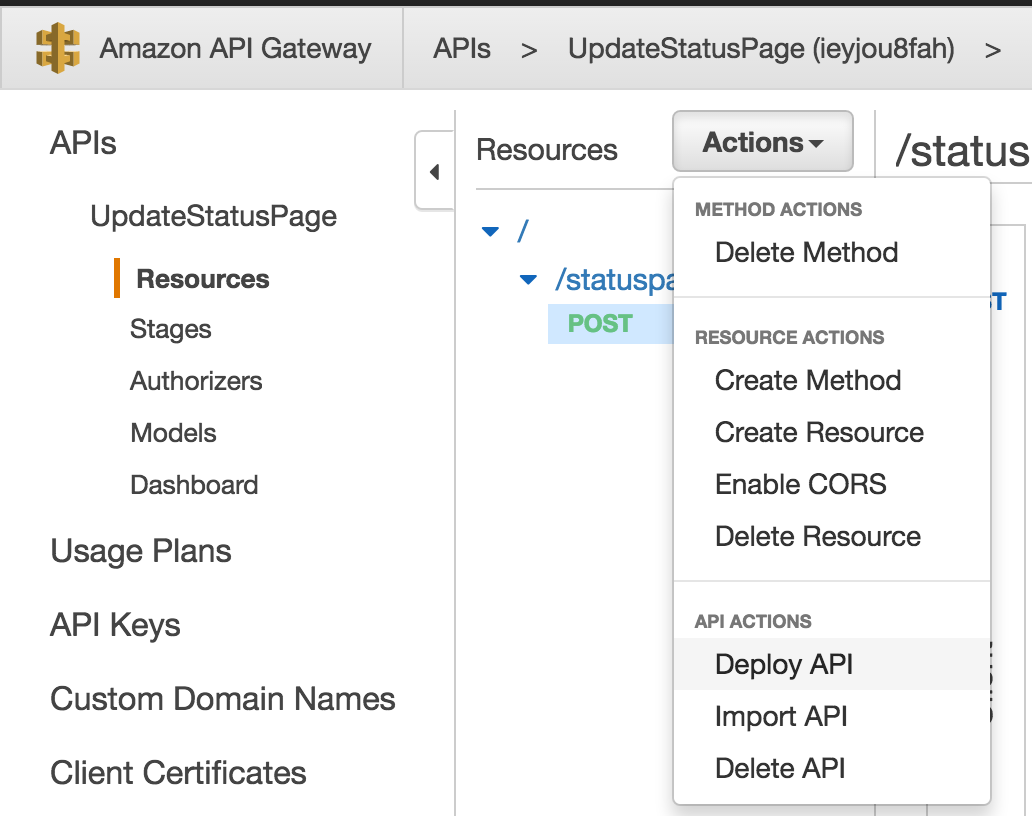
When you’re done testing, you should see a link from Lambda function to your API Gateway. Click over to your new UpdateStatusPage API and open the tree/hierarchy explorer until you reach the /statuspage resource, POST method. You’ll need to Deploy this API to the prod stage to activate it, as shown.
Now that we think the API Gateway is setup correctly, we can test our new system from this layer. It’ll provide an HTTP endpoint that, when called, will trigger our Lambda to do the actual execution. Notice the small Test button here. Click it.

The next page lets you fill in HTTP request details. No request body or other parameters is needed for this call. Just send the test and look for the same output as before, either “generating” or “nothing new to commit”.
Finally, we should see our full webhook URL, ending with /statuspage. You’ll need to click into /statuspage POST in the “prod” stage (under UpdateStatusPage API > Stages on the left).
To the right you’ll see a large “invoke URL” like https://abcdefgh.execute-api.us-east-1.amazonaws.com/prod/statuspage. With our new webhook in hand, we can configure Github to actually trigger our new API in Amazon.
Open up your statuspage Github repo, click the Settings tab, and finally the “Webhooks & services” navigation on the left.

Click “Add webhook”, enter your new webhook URL from Amazon’s API Gateway, and set the “Issues” and “Issue comment” events to trigger it, like so

Go ahead and make some changes in your statuspage repo.
You should see changes to your issues automagically updating your new statuspage!
What cool server-less projects have you built with Amazon lately?

0 Responses
Stay in touch with the conversation, subscribe to the RSS feed for comments on this post.